Guest post by New England Clean Energy Customer Carl Howe
Since my solar energy system was installed in Dec. 2013, and turned on in Jan. 2014, I’ve had a lot of questions from friends and neighbors about the process. Here is a summary of how I went solar through the Stow Solar Challenge in Stow, MA.
We used New England Clean Energy from Hudson MA as our installer. I believe they are one of, if not the, highest quality installer in our area. They have more than 300+ installations in MA and NH. Of course, SolarCity and others are also in the region, so they compete with them regularly, and anyone interested in solar has many alternatives (including big chains). We preferred working with a local company we knew as we have had excellent experiences with local contractors.
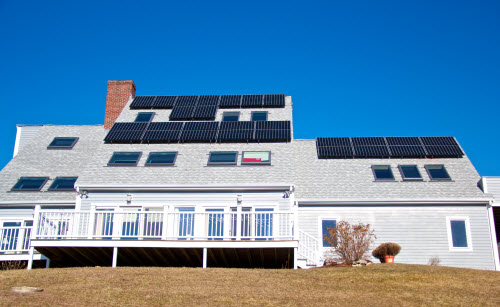
We own our system, and financed it using two loans: a zero percent loan for the federal rebate, which pays 1/3 of the total cost of the system; that loan will be repaid by our income tax refund in the next few weeks. The rest of it is financed over 11 years at 3% APR. The money we saved on the capital cost of the solar installation we paid instead to replace and upgrade our roof and 18 skylights (see photos) so we wouldn’t need to touch those for the lifetime of the solar panels or longer.
Our site is unusually good for solar production. Our house faces due south and the roof pitch is almost exactly our latitude. As such, the average Solmetric reading is 97% of ideal and during many parts of the year, it is 99% of ideal. We considered ground mounting, but our roof is so good, it would have been a shame not to use it and my wife hated the look of ground mounted panels.
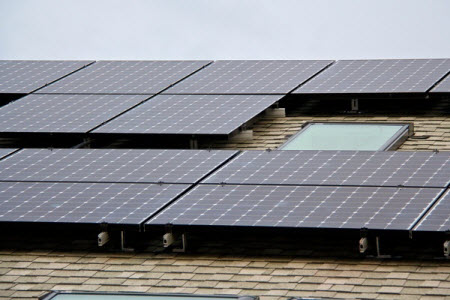
Our installation has 27 SunPower SPR-X21-335-WHT panels mounted on two roofs. That produces 9.045 nominal kW at full power. Actual peak results in the first month have been >9.2 kW at noon, which I understand is because the panels are more efficient when cool (and our winter has definitely been cool). Their efficiency is actually lower in summer months, but you get more hours of sunshine that more than make up for it.
The panels are split into two arrays: one with 19 panels and one with 8. The “big” array (19 panels) feeds a 6500W inverter, while the smaller one feeds a 3000W inverter. The two inverters feed a utility-grade meter for SREC purposes and a web server which monitors the performance of the installation. We have another two-way utility meter mounted on the outside of the house.
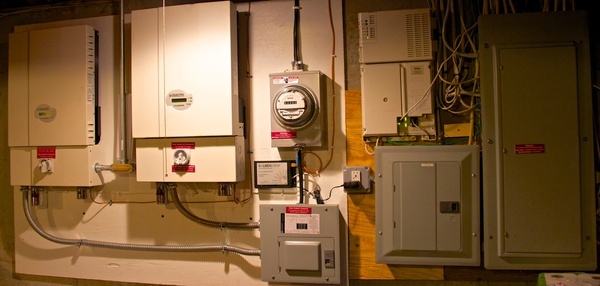
The inside meter measures how much power the array produces. The outside meter measures both the power flowing to the grid and the power flowing from the grid throughout the month. If those two figures—kWhs flowing to us and kWhs supplied from us—are the same, our utility bill is $0 for that month. We expect to use more power than we produce most months. In our net metering world in Stow, we buy power at retail prices (roughly $0.15 / kWh), but sell at wholesale prices ($0.04 / kWh). Given the capital costs of a solar system, cottage solar power farming isn’t really a money-making business unless you have a lot of cheap cash lying around.
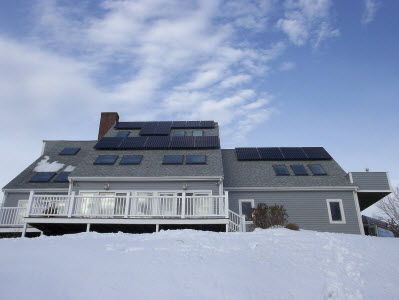
Everyone asks about snow: Yup, the panels get covered with snow during snowstorms and produce very little power when that happens (if it is less than 6 inches or so, they do still produce power from the light that shines through the white stuff). However, they are mounted at a 45 degree angle, and if we get more than about 2 hours of strong sunshine after the storm, the snow slides right off.
To give you a sense of timeline, we signed our documents on October 9, 2013. Our roof was replaced during October/November, and our solar system was installed in December during very challenging conditions including snow and 12 degree weather and high winds. The installation was completed on December 20. Our inspections and utility certification took place over the next 30 days or so, and we turned on the system on January 29, 2014.
You can see how much power we are currently generating and its history in real time here.
And that sums up our experience of going solar.
If you liked this article, you might also enjoy:
